Tutorial: PDF Generation Directly in Airtable with DynamicDocs API
13 December 2022 Igor RodionovThis article shows how to generate a PDF based on one of the DynamicDocs JSON to PDF templates from Airtable. PDF generation is done by setting up a script which can be prompted with a button. The script creates a JSON with underlying data from Airtable and uses DynamicDocs API to generate the PDF. The PDF is then downloaded and put into the Airtable attachment field.
What is Airtable?
Airtable is a cloud-based collaboration platform that allows users to organize and manage their work. Think of it as Excel meets a database in the cloud. It combines the features of a spreadsheet with the flexibility of a database, making it a powerful tool for organizing and tracking data. Airtable is often used for project management, event planning, and other applications where teams need to manage and collaborate on data. It offers a wide range of customization options and integrations with other tools, making it a popular choice for businesses and teams of all sizes. DynamicDocs API is one such integration which lets users generate PDFs based on LaTeX templates and ready-made JSON to PDF templates (which require no knowledge of LaTeX).
What is JSON to PDF?
JSON to PDF is a technology that allows users to convert a JSON file (which stands for JavaScript Object Notation) into a PDF document. JSON is a common data format that is often used for storing and transmitting data, especially in web applications and APIs. DynamicDocs API offers a library of ready-made JSON to PDF endpoints. They do not require any knowledge of LaTeX (DynamicDocs is a PDF API based on LaTeX) as its content and format are completely controlled by the JSON. For the purpose of this tutorial, the QR Code v1 JSON to PDF template will be used, which creates a PDF with QR code and caption in the following format.

Create PDFs in Airtable with the Scripting Extension
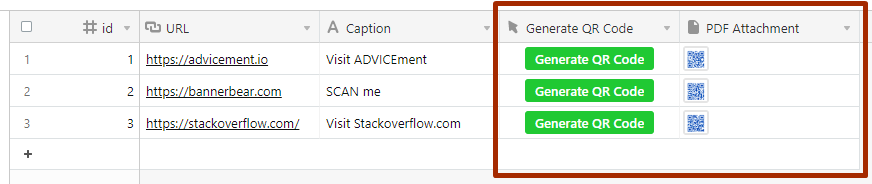
To get started we created the following table in Airtable with the data we need to generate a QR code:

Notice the Button And Attachment fields (named Generate QR Code and PDF Attachment respectively) which will be used to run the script and save the generated PDF file in the Airtable directly. To make API calls to DynamicDocs API, we will need to Add an Airtable Extension called Scripting. Scripting is used to write Javascript code to perform repeatable tasks. In our case, we will use it to format the JSON payload and call the DynamicDocs API. To authenticate the API calls, we require the DynamicDocs API-Key (Adv-Security-Token as a header parameter), which is generated in your account's dashboard on advicement.io. Each account is given a Free plan with a limited number of monthly API calls. For more information on authentication and calling the API, please consult DynamicDocs API documentation.
Save the Generated PDF in the Attachment Field
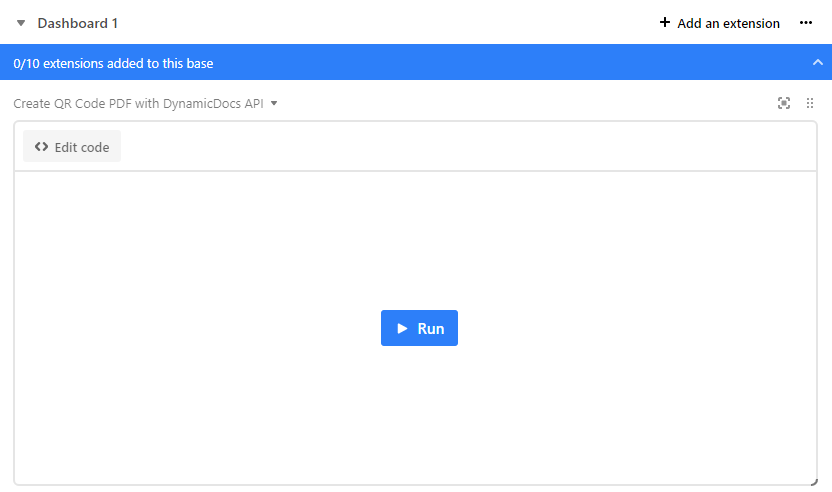
Once we obtained the DynamicDocs API-Key and activated the Scripting extension, we added the following code to the script named 'Create QR Code PDF with DynamicDocs API'.
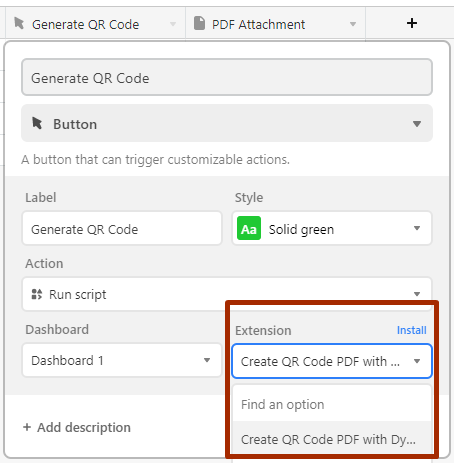
Now Airtable may automatically link the newly created button field with the script above. Alternatively, you can do so by opening the Button field options and selecting your script:
Now we can simply click the button in each record and wait a couple seconds while the PDF appears in the Attachment field.
PDF Generation Script Explained
For more interested readers, we provide an explanation of the script used to call DynamicDocs API from Airtable. This section is particularly useful if you need to adapt the script above for your specific scenario or integrate with an alternative JSON to PDF template.
The first thing the code does is define two constants: 'API_KEY' and 'TEMPLATE_TOKEN'. The 'API_KEY' constant is used to authenticate the user's access to the API, while the 'TEMPLATE_TOKEN' constant is used to specify which template to call. In our case, we will be calling the QR code v1 template.
Next, the code defines a 'timeout()' function that takes a single argument, 'ms', which represents the number of milliseconds to wait before resolving the promise. This function is used later in the code to pause execution of the program while the PDF is being generated.
The code then uses the 'base.getTable()' function to retrieve a table named "QR Codes" and stores it in the 'currentTable' variable. The 'input.recordAsync()' function is then used to prompt the user to pick a record from this table, and the selected record is stored in the record variable.
The 'caption' and 'url' variables are then defined by extracting the values of the "Caption" and "URL" cells from the selected record, respectively. The value of the 'url' variable is also modified by removing any commas and whitespace from it.
The data variable is then defined as an object that contains the settings and content for the PDF. The 'documentSettings' property of this object specifies the color of the page, the color of the QR code, the color of the text, the font, the height of the QR code, the height of the document, and the width of the document. The 'documentContent' property specifies the caption and URL to be used in the PDF.
The code then uses the await keyword to make asynchronous requests to an API using the 'remoteFetchAsync' function. The first request is a 'POST' request to the 'https://api.advicement.io/v1/templates' endpoint, with a JSON-encoded body containing the data object and headers specifying the 'Content-Type' and 'Adv-Security-Token'.
After making the first request, the code uses the 'await' keyword to wait for the response, which is stored in the 'response1' variable. The json() method is then called on the response1 object to parse the JSON-encoded response data, and the resulting object is stored in the 'documentStatus' variable.
The 'documentStatus' object contains a 'documentStatusUrl' property, which is stored in the 'documentStatusUrl' variable. This URL is used in the next request, which is a 'GET' request made again using the 'remoteFetchAsync' function.
Before making the second request, the code sets the 'maxNumberOfTries' variable to 60 and the 'sleepBetweenTries' variable to 10000. These variables are used to control the number of times the code will attempt to make the second request and the interval between each attempt. The tries variable is initialized to 1, and a while loop is used to make repeated attempts to fetch the document status from the 'documentStatusUrl' until either the 'statusCode' property in the response is not equal to 102, or the number of tries exceeds the 'maxNumberOfTries' value.
Each time the while loop iterates, the 'tries' variable is incremented and the 'timeout' function is called with a delay of 'sleepBetweenTries' milliseconds. This causes the code to pause for the specified amount of time before making the next attempt to fetch the document status.
After the while loop completes, the code checks the 'statusCode' property in the response to determine whether the document is ready to be downloaded. If the 'statusCode' is 201, the code updates the current table with the URL of the generated PDF document. If the 'statusCode' is not 201, the code outputs a message indicating that the document could not be downloaded after the specified number of tries.
Final Remarks
The code above can easily be adapted to different fields and used to generate different PDF types. Visit JSON to PDF template page for a list of available ready-made templates from DynamicDocs API. Alternatively, visit DynamicDocs API on the Postman API network for api call examples in other computer languages.